Overview
This project introduces how to make a GR-ROSE sketch using IDE for GR. It is available on Windows and Mac.
Preparation
Hardware
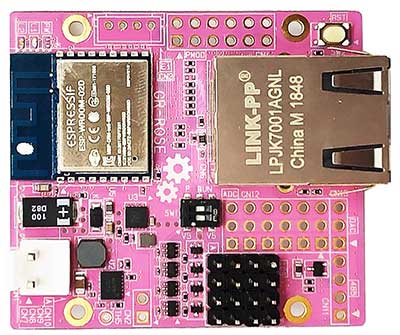
Prepare a GR-ROSE board and a USB cable (Micro B type).
Software
First, download IDE for GR v1.06 or later. If using Windows, decompress the zip file. If using Mac, open the DMG file and register it as an application. IDE4GR will be added to Finder as an application.

Procedure
1. Start IDE for GR
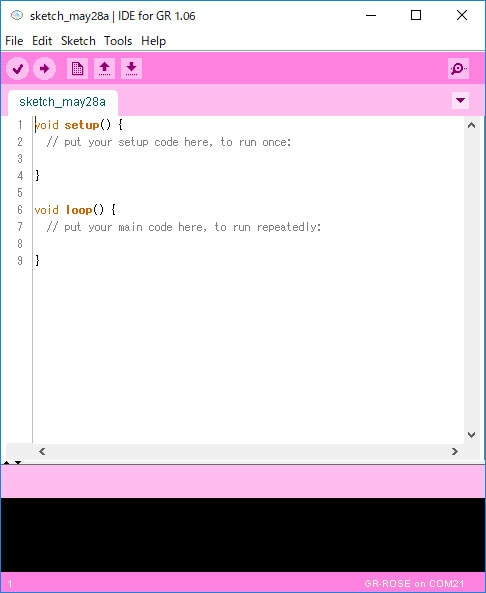
For Windows, run "ide4gr.exe" from the folder after decompression. For Mac, start "IDE4GR" from the Finder application. The screen shown here will be displayed for the sketch.
2. Board Selection
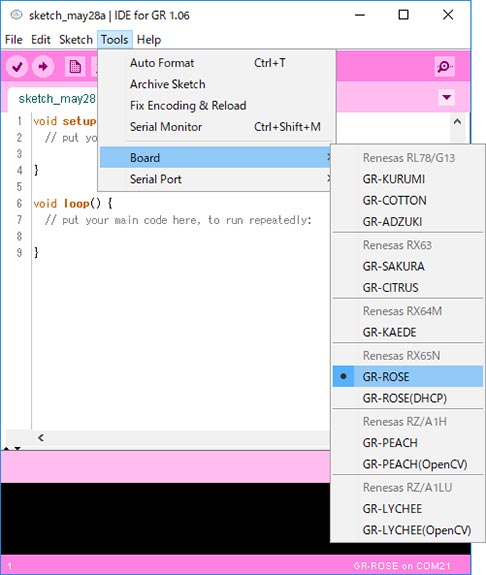
Select the menu [Tools] -> [Board] -> [GR-ROSE].
Note: When "GR-ROSE (DHCP)" is selected, an IP connection will be obtained by DHCP for Ethernet connection. This is assuming connection to AWS IoT. There is no need to select it for other uses. If not DHCP, it will be a fixed IP, but in this case, the IP address is set in the Ethernet class.
3. Make a Sketch
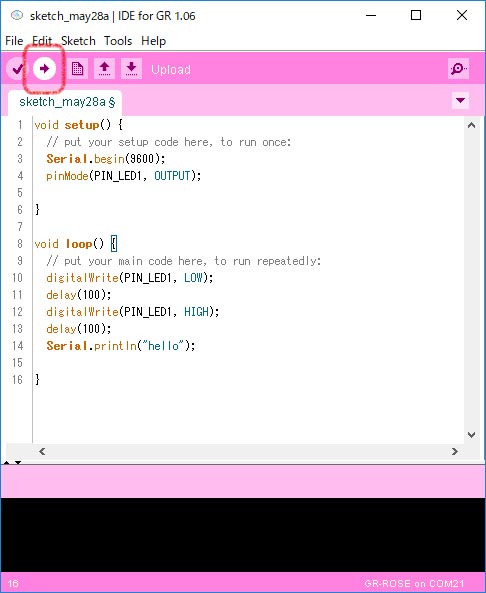
Copy the sample program shown here. It is a sketch that makes the LED blink and outputs "hello" to the serial monitor.
void setup() {
  // put your setup code here, to run once:
  Serial.begin(9600);
  pinMode(PIN_LED1, OUTPUT);

}

void loop() {
  // put your main code here, to run repeatedly:
  digitalWrite(PIN_LED1, LOW);
  delay(100);
  digitalWrite(PIN_LED1, HIGH);
  delay(100);
  Serial.println("hello");

}
4. Connect GR-ROSE and Push Reset
Connect GR-ROSE to a PC with the USB cable. Then, push the GR-ROSE reset button. GR-ROSE is recognized as a USB drive.

5. Compile and Flashing
Press the arrow as shown in the figure to the right. Compiling of the program begins and writing of the program is done.
If the flashing is successful, the GR-ROSE LED will blink.
6. Selection of Serial Port
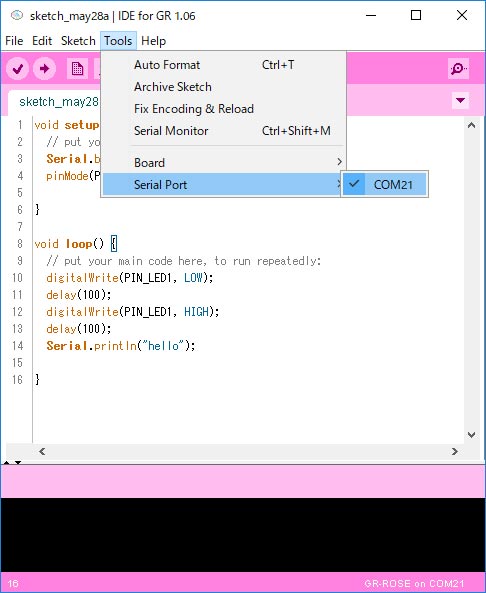
Select a port from the menu [Tools] -> [Serial Port].
The port is displayed as "COMx" for Windows and "/dev/cu.usbmodem1_1" for Mac OS.
7. Check Serial Output
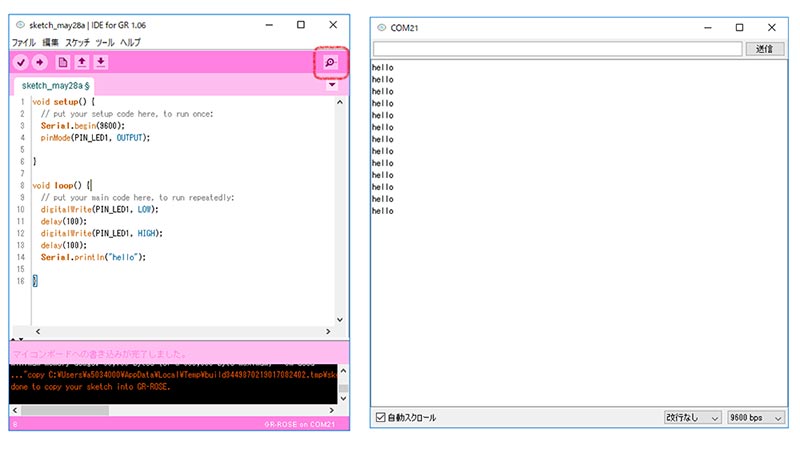
Press the magnifying glass button at the top right of the sketch screen to display the serial monitor, you can confirm that "hello" is output.
Support

Support Communities

