Today, sensing equipment is undergoing major evolution due to digitalization. Until a decade ago, full-analog sensing equipment was the mainstream. In order to realize high precision sensing equipment, compensations such as linearization and temperature compensation are mandatory. However, it was quite difficult to perform these compensations in the full-analog configuration.
As MCUs and ADCs have been widely adopted, high-precision sensing equipment has been introduced due to the advancement in digital signal processing that can easily perform linearization and temperature compensation. In recent years, sensing equipment had been evolving further with multiple sensors mounted on a single piece of equipment, and more complex signal processing was implemented.
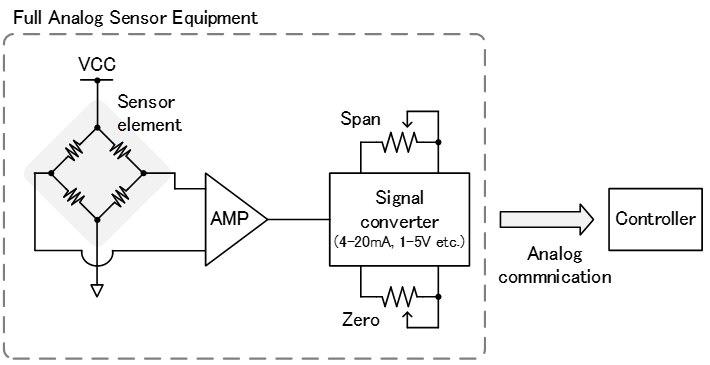
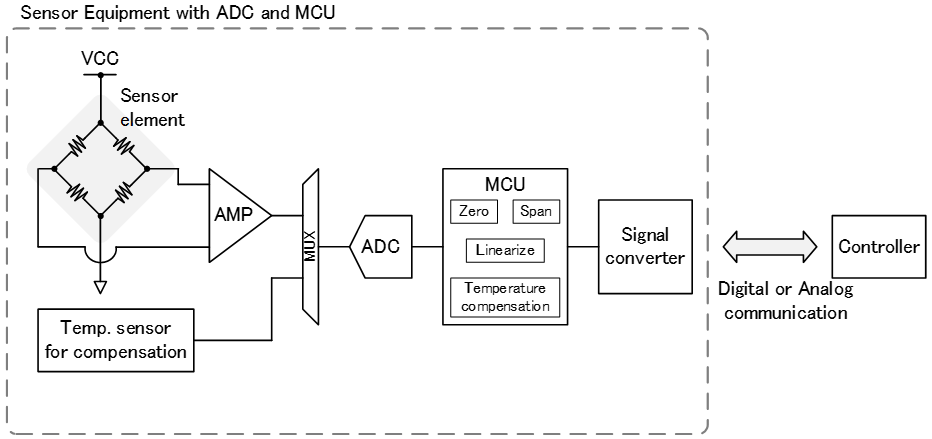
Among all these sensors used in the equipment, Renesas has been focusing on the force sensor. As an example of its usage, a force sensor is mounted to the tip of a robotic arm to measure load and torque. As shown below, strain sensors are attached to a structure, and they are expanded/compressed when a force is applied to it. By measuring this expansion/compression of the structure, the load and torque can be measured.
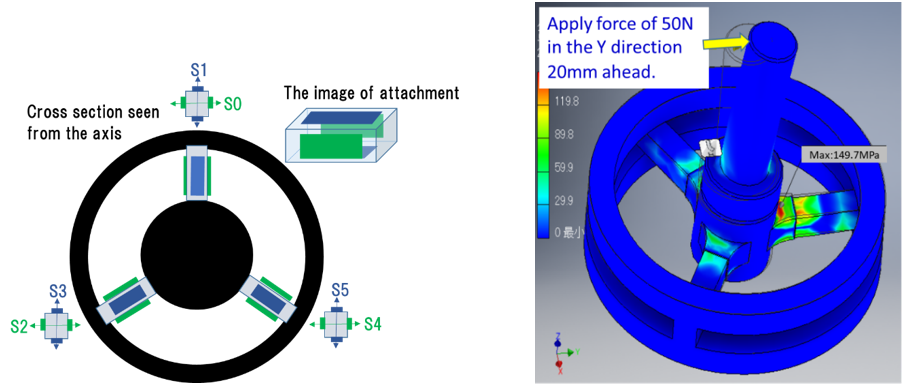
In the case of the 6-axis force sensor, a total of 6 strain sensors are mounted. It is possible to measure up to 6 axes in total by combining the loads on the 3 axes (X/Y/Z) and the torques around each axis. The loads F and torques T are calculated from the strains S by using the following determinant.
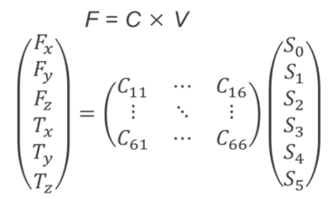
In order to control the robotic arm precisely at high speed, the force sensor is required to perform strain sensing measurement and the above matrix operation at high speed. In addition, it is important that the board size should be small enough so that the force sensor can be mounted at the tip of the robotic arm.
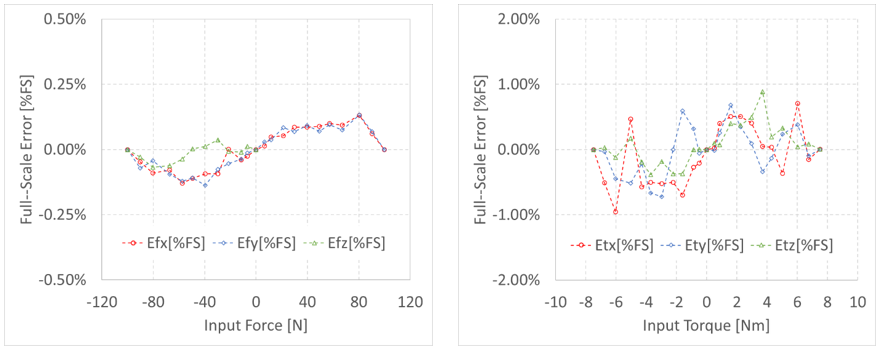
The RX23E-A may be the best option to address these challenges. The RX23E-A is a product embedded with a low noise/drift AFE and RXv2 CPU core that is ideal for DSP/FPU operations in a single chip. Therefore, the configuration of the RX23E-A supports the force sensor. This time, Renesas has published the Application Note that describes an example of the 6-axis force sensor measurement using RX23E-A, and the measurement result is as below.
The result shows that force measurement error is within ±0.25% full-scale, and torque measurement error is within ±1% full-scale, indicating these errors are within the specification of the force sensor used in this measurement.
Table.1 Spec and measurement result

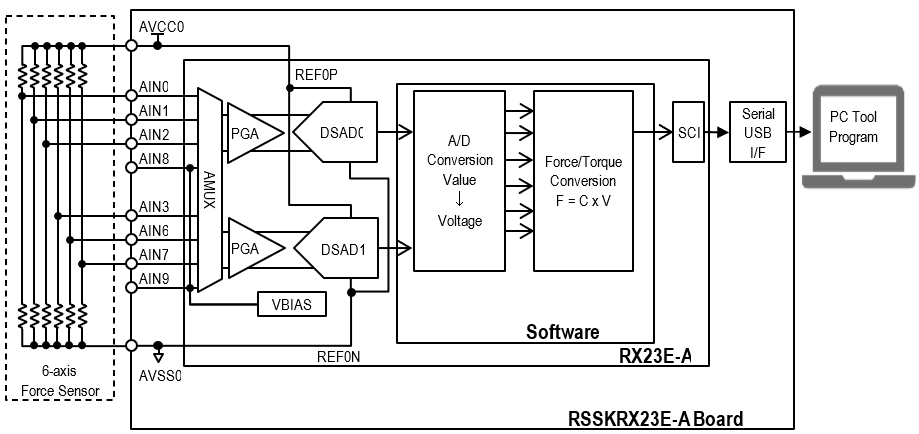
This evaluation was conducted using our evaluation board Renesas Solution Starter Kit (RSSK RX23E-A). The users can measure the force sensor by writing the attached sample program into the RSSK and confirm the result in real-time using the PC tool that comes with the RSSK.
The solution introduced in this blog is posted on our website as an Application Note “RX23E-A Group Force Sensor Measurement Example (Document No.: r01an5447) “.
