概要
デジタルコンパス(HMC5883L)をGR-COTTONに接続して方位を測ってみます。
本ページは編集中です。サンプルプログラムではセンサーの値を取ることはできますが、方位の計算までしていません。

準備
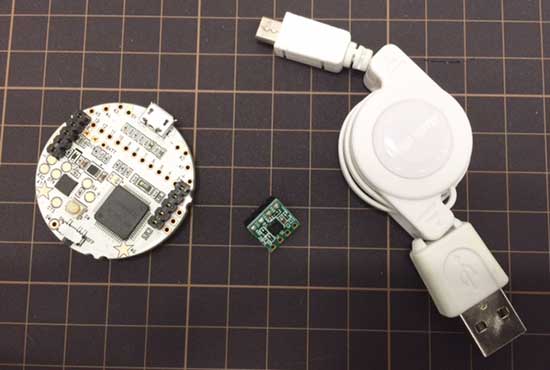
GR-COTTON、USBケーブル(マイクロBタイプ)、HMC5883Lモジュールの3つを準備します。
GR-COTTONにはピンソケット、HMC5883Lモジュールにはピンヘッダーを取り付ける必要があります。
HMC5883Lモジュールの購入についてはこちら(秋月電子通商Web)
ピンソケットの購入についてはこちら(秋月電子通商Web)

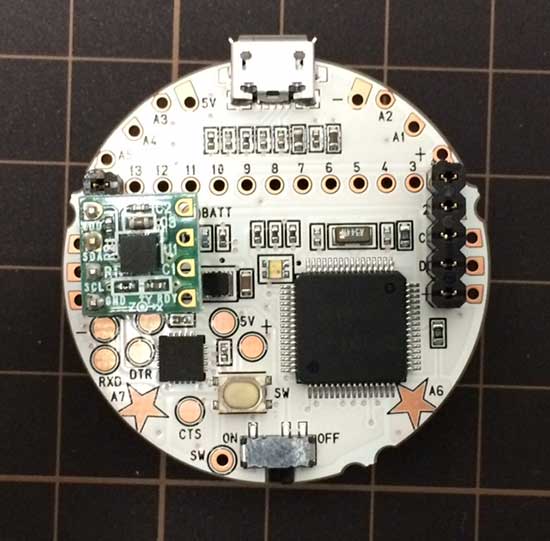
下図のようにHMC5883Lモジュールを、GR-COTTONに接続します。
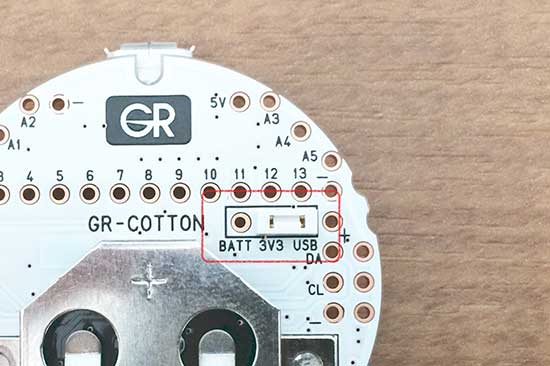
GR-COTTONの裏面にある白いジャンパーが3V3、USB側にします。BATT側にある場合は引き抜いて、USB側に差し込んでください。


デジタルコンパスの値をシリアルモニターに表示する。
0.5秒毎にデジタルコンパスから読み込んだ値をシリアルモニターに表示するサンプルです。
#include <arduino.h>
#include <Wire.h>

#define HMC5883L_ADDRESS 0x1E //7bit ADDRESS

//*********************************************************
void setup()
{
  //Initialize Serial and I2C communications
  Serial.begin(9600);
  Wire.begin();

  //Put the HMC5883 IC into the correct operating mode
  Wire.beginTransmission(HMC5883L_ADDRESS);
  Wire.write(0x02); //select mode register
  Wire.write(0x00); //continuous measurement mode
  Wire.endTransmission();

}
//------------------------------------------------------
void loop()
{
  int x,y,z; //triple axis data

  //set address where to begin reading data
  Wire.beginTransmission(HMC5883L_ADDRESS);
  Wire.write(0x03); //select register 3, X MSB register
  Wire.endTransmission();

 //Read data from each axis, 2 registers per axis
  Wire.requestFrom(HMC5883L_ADDRESS, 6);
  if(6  < = Wire.available()){
    x = Wire.read() << 8;  x |= Wire.read();
    z = Wire.read() << 8;  z |= Wire.read();
    y = Wire.read() << 8;  y |= Wire.read();
  }

  //Print out values of each axis
  Serial.print("x: ");
  Serial.print(x);
  Serial.print("  y: ");
  Serial.print(y);
  Serial.print("  z: ");
  Serial.println(z);

  delay(500);

}


