概要
説明
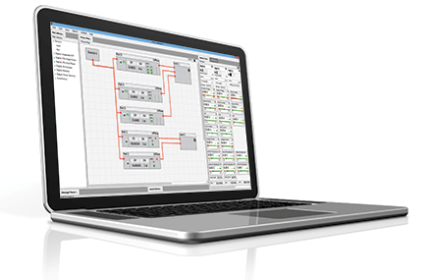
PowerNavigatorソフトウェアにより、USBインタフェースのPC上で、複数のデジタルDCデバイスへの設定とモニタリングを容易にできます。 また、PowerNavigator™では、シンプルなグラフィカル・ユーザ・インタフェースにより、デジタル電源開発に伴う機能と特徴の変更を容易にできます。
プロダクションコンフィギュレーション・ツールとは?
プロダクションコンフィギュレーション・ツール(PCT)では、インターシル製デジタル電源コントローラ/モジュールに対するコンフィギュレーションファイルの迅速な読み込みと検証を行います。
標準のコンフィギュレーションファイルとプロダクションHEXファイルの両方を使用できます。 PCTはどちらのフォーマットでも読み込み、検証を行えます。
プロダクションコンフィギュレーション・ツールの特長
- 複数のデバイスの設定を同時にプログラムまたは検証
- PowerNavigatorがサポートするすべてのデバイスに対応
- error.txtファイルへのデータロギング
リリース情報
PowerNavigator 5.4.113と5.4.139での主な変更点
新機能
以下のサポートを追加:
- ISL8280M、ISL8282M*
- RAA210833、RAA210850、RAA210870、RAA210925
- ISL91212A、ISL91212B、ISL91301A、ISL91301B、ISL91302B
*PowerNavigatorは、ISL8280MまたはISL8282Mを単一製品タイプのISL828xMとして検出します。
システム要件
- 32ビットまたは64ビットのWindows® Vista、Windows® 7、Windows® 8またはWindows® 10
- 最小画面サイズ:1024 x 768px
プロダクション環境で働いている方へ プロダクションコンフィギュレーション・ツールを使用する必要があります。
サポートされている製品
- 統合FETデジタルレギュレータ:
ZL2101、ZL2102 - デジタルコントローラ:
ISL68200、ISL68201、ISL68300、ISL68301、ZL6105、ZL8101、ZL8800、ZL8801、ZL8802 - デジタル多相:
ISL6388、ISL6398、ISL68124、ISL68127、ISL68134、ISL68137、ISL68144、ISL68147、ISL69122、ISL69124、ISL69125、ISL69127、ISL69128、ISL69133、ISL69134、ISL69137、ISL69138、ISL69144、ISL69147、ISL69158 デジタルモジュール:
ZL9006M、ZL9010M、ZL9101M、ZL9117M、ISL8270M、ISL8271M、ISL8272M、ISL8273M、ISL8274M、ISL8277M、ISL8278M、ZL9024M、RAA210833、RAA210850、RAA210870、RAA210925、ISL8280M、ISL8282MISL8210MとISL8212Mはサポートされていませんのでご注意ください。 デジタルコントロールバスを搭載していないため、PowerNavigatorのサポートは必要なく、そのメリットもありません。
- デジタルパワーモニタ:
ISL28023、ISL28025 - パワーマネージメントIC:
ISL91212A、ISL91212B、ISL91301A、ISL91301B、ISL91302B - 自動車:
ISL78229
ターゲットデバイス
ドキュメント
|
|
|
|
|---|---|---|
| 分類 | タイトル | 日時 |
| ガイド | PDF 4.68 MB | |
| マニュアル-開発ツール | PDF 5.52 MB | |
| ガイド | PDF 714 KB | |
| アプリケーションノート | PDF 1.08 MB | |
| マニュアル-ハードウェア | PDF 693 KB | |
5件
|
||
ビデオ&トレーニング
Learn the basics about the monitoring and sequencing views and how to customize your display.
Transcript
In this video, I'll give you a quick overview of some of the high level functions and benefits of the PowerNavigator GUI. And then, in subsequent videos, we'll deep-dive on each function and show you how to set up and configure that parameter. So let's take a look at the starting point.
So we can see on the screen here is a typical system we've put in place with three different devices, three different output voltages for, let's say, a core voltage, a memory and an I/O rail. So what you've got is the ability to view the entire system from a power architecture standpoint, what rails are set up, what's the input voltages coming through, and how the devices cascade in the system.
On the left side we've got the monitoring screen up, that way you can monitor every single rail. Now, these panels are configurable. You can go through and select what you want to see at a screen at any point in time. So let's take a look at how the monitoring screen works. So the tab on the left shows that we're viewing the monitoring, and you can see the three rails are powering up. The tab on the left shows the monitoring view, so what we can see now is the system display for the three different rails that we have in the system. Looking from the top to the bottom as we walk our way through it, you can see we've got what the output voltage is set to, how the device is configured, to either use enable pin or PMBus enable.
And then you've got the displays. So these are graphical displays using an analog meter to show you what the output voltage is, the output current, input voltage, and also, if the device has it, the input current. At the bottom you've got the ability to manage your temperature. With all these devices, there's a temp sensor internal to the device that measures the junction temperature of the silicon and also the ability to use an external temperature monitor if you want to compensate for, say, the DCR variation of the inductor. At the very bottom, it gives you the run time specifics of duty cycle and frequency.
So right now you can see everything is set to zero because we're not connected to any hardware. One of the big enhancements with this version of PowerNavigator is the ability to configure the display. So right now it's a vertical view. We can go to a dashboard view from a horizontal. We can select what information you want to see in that. The benefit of this is, if you have a large system with maybe 30 to 40 rails, you can display every single power supply on one page. It's easily identifiable in terms of color coding, whether the device is operational or a fault has occurred. Worst case condition, if a fault occurs on a single rail, you can also go in to the fault status page as shown here in the left tab.
Clicking on this pulls up a fault screen, and right away you can pinpoint the exact problem with that power supply rail, whether it's something like an overvoltage condition, overcurrent, or maybe the input voltage hasn't been applied. The last page here is the sequencing tab. When you go into sequencing, now you have a graphical representation of what the device does during power up or power down. And then you've got the ability to sequence the rails, so you can sit there and drag and drop. So with a single mouse click, I can take this rail and I can change the soft-start time. I can also change the timing. So you want a time-based sequencing? I can delay one rail with respect to another. If you know all your parameters, you can also type them in quickly to set up the different timing patterns.
In some later videos, I'll show you some of the other benefits behind the sequencing and the monitoring views, and also how you set up the projects. Please continue watching, and we'll go through detail on each one of these functions.


